The piano action is made of wood, felt, and a small amount of metal and buckskin. A piano which has been played a lot, whether heavily for a short period of time or less often for a long time, experiences wear and tear, especially on the felt parts.
Many of these parts become worn, misshapen, broken, or even lost. The piano accumulates dust and debris.
Some parts can be “brought back to life” with proper treatment. Others need to be replaced. We will be happy to examine your piano and provide a written estimate of work that your piano needs.
Hammer recontouring
In both grand and vertical pianos, the felt hammers become grooved, sometimes quite deeply, where they have been striking the strings. In a piano that is rarely used this may take decades to occur. In pianos that are heavily used, like practice room pianos in music schools which may get played many hours a day, it may only take a few years.
When hammers are new, only a very small area of the face of the hammers is striking the strings. When grooves are worn into the hammers, a half inch or more of the face of the hammers can be striking the strings, causing harsh and uneven tone.
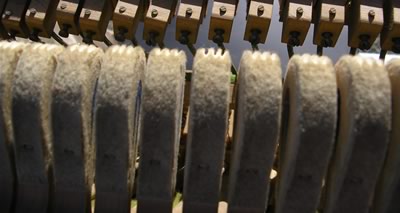
You can see the grooves in an upright piano if you lift the lid and look straight down at the hammers from above. You will see something similar to the photo below.
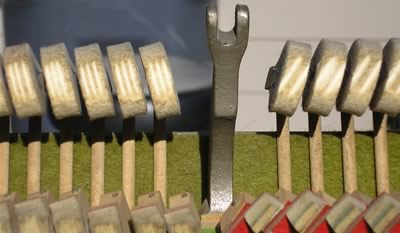
Grooved Hammers seen from the rop
An experienced technician can recontour the hammers, restoring their original shape. This not only prolongs the life of the hammers, but often improves the tone of the piano. When hammers are recontoured or “filed” correctly and expertly, the felt is taken off in layers until no string grooves remain and the original curve of the outline of the hammer is restored.
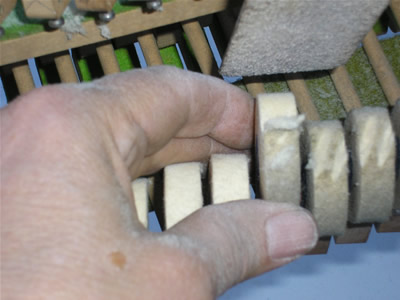
A hammer being “filed”
The hammers should not just look “clean”. In an attempt to make the piano look like it has had work done on it, a Dremel tool is sometimes used just to quickly take the dirt off the hammers and make the felt look clean. This is simply cosmetic, and will not correct the problem. Upon closer inspection, grooves can still be easily detected on the hammers. This is an indication that they were not correctly recontoured.
A proper hammer recontouring job, as below, leaves the hammers with felt evenly removed all around the curve of the hammers. The striking surface must also be filed evenly “left to right” so it meets the strings evenly.
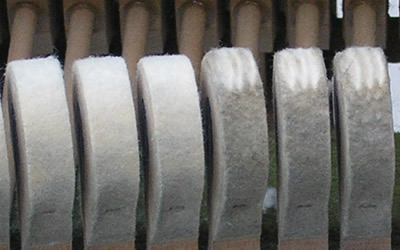
Hammers after being “filed” and before
At some point in the piano’s life, there may not be enough felt left on the hammers to allow recontouring, and the hammers must be replaced. That is a much more labor intensive and expensive job.
Key rebushing
Each key on a piano is held in place by two pins: the balance rail pin near the center of the length of the key, and the front rail pin which holds the key in place at the front. There is a hole near the middle of the key through which the balance rail pin goes, and there is a hole in the underside of the front of each key which fits over the front rail pin. Each of the holes is “bushed” with thin felt. When the piano is new, the bushings are loose enough to allow the key to move freely up and down, but tight enough so that there is no sideways movement of the key.
After the piano has been played a lot, the felt bushings become worn and compressed, and the keys get what I call “woogedy woogedy” – they wobble from side to side, sometimes so much that they click and knock against neighboring keys. This gives the pianist a very insecure feeling, and causes a loss of power since not all of the energy is going downward.
[The photos below show the rebushing of front rail holes. The same process is used for rebushing balance rail holes.]In the photo below, note the indentations the pins have left in the felt.
There is one bushing that is missing completely.
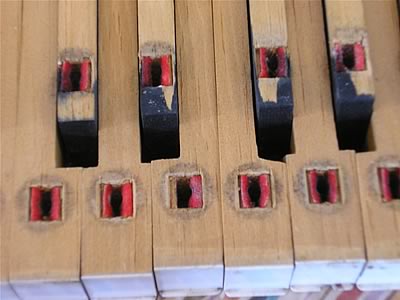
Old worn and missing key bushings
The proper way to correct worn keybushings is to replace the felt bushings. This must be done extremely precisely. First the old bushings must be removed by steaming them and lifting them out.
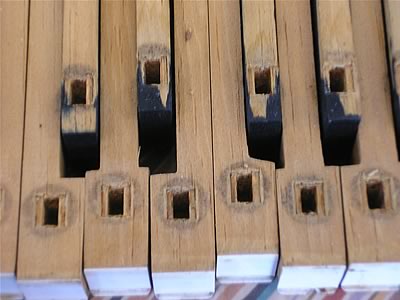
Key bushings have been steamed and removed
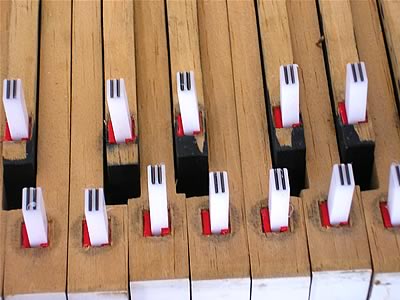
Cauls holding new bushings in till glue dries
Next, the right thickness of felt must be determined to assure the proper fit for the size of pin that will be going into it. Hot hide glue is put on the felt, and it is held in place with special cauls. The edges of the felt must be trimmed carefully so no felt is left poking up, since this would throw off the regulation of the key dip when the keys are back in the piano.
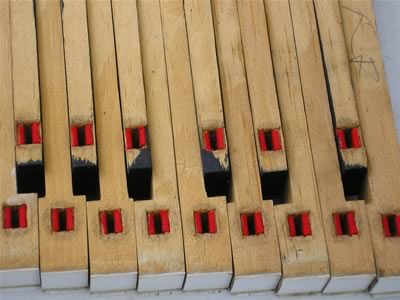
New key bushings
After the glue has dried, the cauls are removed. If the rebushing has been well done, very little adjustment (easing) of the bushings will be needed when the keys are put back into the piano.
Replacing punchings and cleaning keybed
On each of the balance rail and front rail pins, the key is cushioned underneath by a felt punching. The felt punchings under the keys and other felt parts on the piano can become compressed, moth eaten, and/or misshapen after heavy use. Note the moth eaten felt in the photo below. Theses photos are of a vertical piano, but the same type of punchings are used in grand pianos. Many old pianos are 80-100 years old, which sometimes means 100 years of dust inside! I once found a mouse’s nest of shredded newspaper under the keys, with an intact mouse skeleton in the nest.
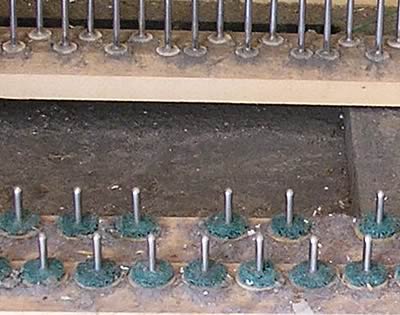
Keyframe with old punchings and dirt
While the keys are removed, I will clean and vacuum the inside of the piano. (For grand pianos, this only includes vacuuming the keybed and cleaning dust out of the action. Cleaning the soundboard is an extra process and there is an additional charge for that. See Piano Cleaning.) If the key pins are tarnished they can be polished and sprayed with lubricant. If the felt punchings have deteriorated, they are replaced. If they are still in good condition, they can be left in place and while vacuuming around them.
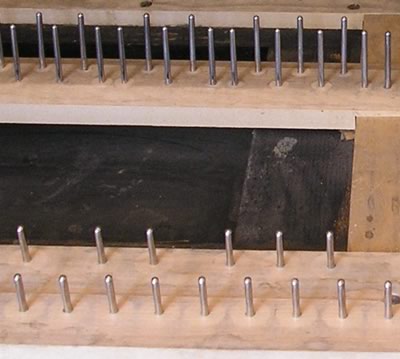
Keyframe with punchings removed
The felt punchings, and the paper punchings under them, can be replaced, but because replacing the punchings will change the relationships among the parts of the piano action, the action will have to be regulated when punchings are replaced.
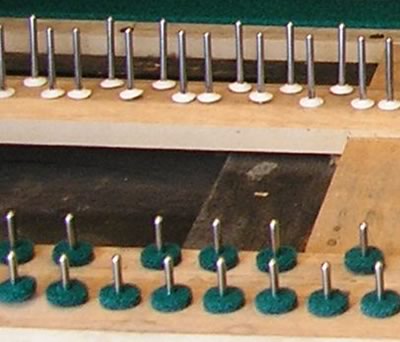
Keyframe with new punchings
See the Regulation page for a more detailed description, diagrams of vertical (upright) and grand actions, and a description of the regulation process.